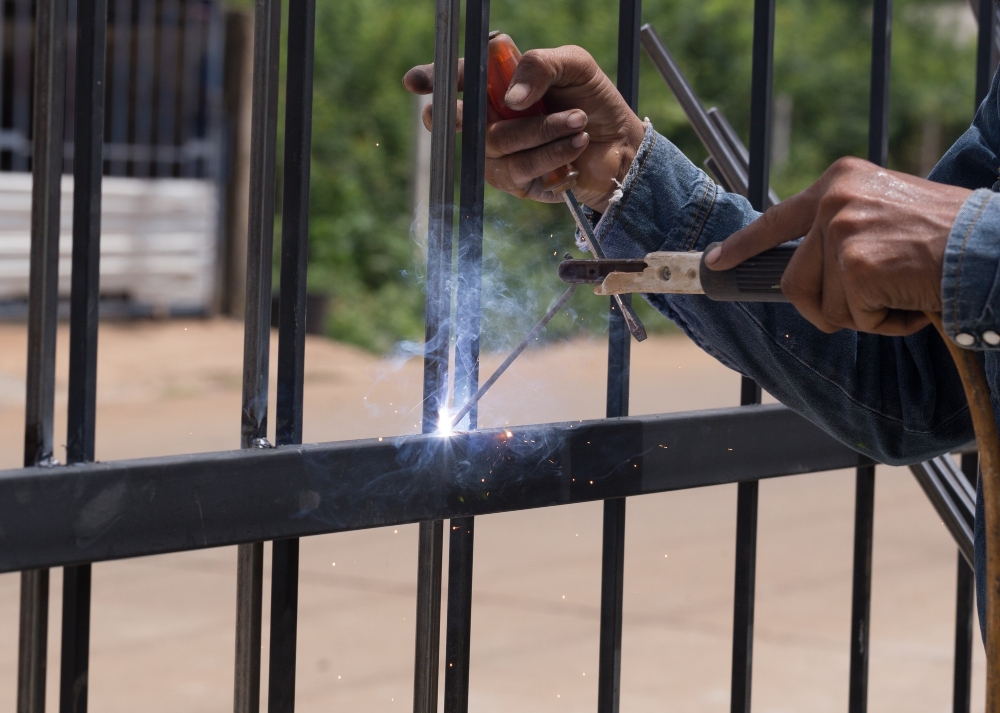
Fence

Fence Construction & Repair in Galveston, Texas


As a general rule every property should have a method of defining its property boundaries. A fence is a great way of doing that. There are many styles of fencing to meet all the needs a property owner may have. Fences can provide security, privacy, containment, style, and increase your property's value.

Fences can do more than define the boundary of your property. Fences can be used as a kennel for your pets or as security around a hazard on your property such as pools, retainage ponds, or other areas of danger. They also limit access and direct traffic around your property. With strategically placed gates you can decide where or where not people or animals go.

Building a Privacy Fence

A privacy fence is a great addition to any property, providing security and seclusion. If you're considering building a privacy fence, this guide will walk you through the process step-by-step.

1. Planning and Preparation

Before starting any construction, it's important to plan and prepare for your privacy fence project:


  • Check local regulations: Research your local zoning and building codes to ensure compliance.
  • Define your needs: Determine the purpose of your fence, the desired height, and the materials you'd like to use.
  • Measure the area: Measure the perimeter where you want to install the fence, and mark the boundaries.
  • Prepare materials and tools: Make a list of the necessary materials and gather the tools required for the construction.


2. Choosing the Right Materials

Selecting the right materials for your privacy fence is crucial for its durability and appearance:


Fencing material: Common options include wood, vinyl, metal, or composite. Consider the pros and cons of each to make an informed decision.

Posts and rails: Determine the size and type of posts and rails based on the height and style of your fence. Pressure-treated wood is commonly used for posts.

Hardware and fasteners: Choose appropriate hardware such as hinges, latches, and screws for attaching the fence components securely.

3. Building the Fence

Follow these general steps to construct your privacy fence:


  • Install corner posts: Dig holes for the corner posts and set them in concrete for stability.
  • Set line posts: Dig holes for the line posts, ensuring they are evenly spaced. Set them in concrete as well.
  • Attach rails: Connect the rails to the posts, using appropriate fasteners. Use a level to ensure the rails are straight.
  • Attach fencing material: Depending on the type of material you're using, attach it to the rails or posts using nails, screws, or brackets.
  • Add finishing touches: Install post caps, trim any excess material, and stain or paint the fence, if desired.

4. Maintenance and Care

Proper maintenance is essential to keep your privacy fence in good condition:


  • Regular cleaning: Remove dirt, debris, and mildew from the fence using a mild detergent and a scrub brush.
  • Inspect for damage: Check for any loose or damaged boards, posts, or hardware. Repair or replace as needed.
  • Apply protective coatings: Depending on the material, consider applying a sealant, stain, or paint to protect against weathering.
  • Trim vegetation: Keep plants, vines, and shrubs trimmed away from the fence to prevent damage and maintain visibility.

5. Safety Considerations

Ensure safety during the construction and use of your privacy fence:


  • Wear protective gear: Use gloves, safety goggles, and appropriate footwear during the construction process.
  • Call utility companies: Before digging any holes, contact local utility companies to locate any underground lines.
  • Childproofing: If you have young children, consider installing childproof locks and ensuring the fence meets safety standards.

Conclusion

Building a privacy fence can enhance your property's security and create a private sanctuary for you and your family. By carefully planning, choosing the right materials, and following proper construction techniques, you can enjoy the benefits of a well-built privacy fence for years to come.

Building a Chain Link Fence

Building a chain link fence can be a great way to secure your property, provide privacy, and define your boundaries. In this guide, we will walk you through the process of building a chain link fence step by step.


Materials and Tools

Before starting the construction, gather the following materials and tools:


Chain link fabric

Chain link fence posts

Top rail

Line posts

Tension bands

Fence ties

Gates (if desired)

Gloves

Shovel

Post hole digger

Concrete mix

Level

Measuring tape

Pliers

Wire cutters


Step 1: Planning and Preparation

Start by planning the layout of your fence. Determine the boundaries, measure the area, and mark the positions for the fence posts. Make sure to check local regulations and obtain any necessary permits.

Step 2: Digging Holes for the Fence Posts

Using a post hole digger, dig holes for the fence posts along the marked positions. The depth of the holes should be approximately one-third of the total height of the fence post, plus an additional six inches for gravel and concrete.

Step 3: Setting the Fence Posts

Place the fence posts into the holes and ensure they are level and plumb. Backfill the holes with gravel, and then pour concrete into each hole to secure the posts. Allow the concrete to cure according to the manufacturer's instructions.

Step 4: Installing the Top Rail


Attach the top rail to the fence posts using tension bands. The top rail provides structural support for the chain link fabric. Ensure it is properly aligned and secure.

Step 5: Installing the Chain Link Fabric

Unroll the chain link fabric along the length of the fence line. Attach it to the top rail and stretch it tightly using tension bands and fence ties. Use pliers or wire cutters to secure the fabric to the fence posts and top rail.

Step 6: Installing Line Posts

Install line posts along the length of the fence at regular intervals, typically 8 to 10 feet apart. These posts provide additional support for the chain link fabric. Attach the fabric to the line posts using fence ties.

Step 7: Adding Gates (if desired)

If you want to include gates in your fence, install gate posts and attach the gate hardware according to the manufacturer's instructions. Ensure the gates are level and swing freely.

Step 8: Finishing Touches

Inspect the fence for any loose connections or areas that require additional fastening. Trim any excess chain link fabric using wire cutters. Finally, clean up the work area and dispose of any debris.

Conclusion

Building a chain link fence requires careful planning, proper installation of posts and fabric, and attention to detail. By following these steps and taking your time, you can construct a durable and functional fence that will serve its purpose for years to come.

Building a Corral Fence

Building a corral fence is an essential task for anyone who owns livestock or horses. A corral fence provides a safe and secure area for the animals to graze, exercise, and be contained. Here are some steps to follow when building a corral fence:

1. Planning and Preparation

Before starting the construction, it is crucial to plan and prepare. Consider the size and layout of the corral, the number of animals it will house, and the materials needed. Obtain any necessary permits or permissions from local authorities if required.

2. Gathering Materials

Next, gather all the materials needed for the corral fence construction. Typically, you will need fence posts, fence rails or boards, fasteners (nails or screws), and tools such as a post hole digger, level, and saw.

3. Marking the Area

Use stakes and string to mark the boundaries of the corral. This will help ensure that the fence is built in a straight line and follows the desired shape.


4. Digging Post Holes

Start by digging the post holes along the marked boundary. The depth of the holes will depend on the height of the fence and the type of soil. Typically, a hole depth of about one-third the height of the fence is recommended. Space the post holes evenly, usually 6 to 8 feet apart.

5. Installing Fence Posts

Place a fence post into each hole and make sure they are straight and level. Use a level to check the vertical alignment and adjust as necessary. Fill the hole with soil or concrete around the post to secure it firmly in place.

6. Attaching Fence Rails or Boards

Once the fence posts are in place, attach the fence rails or boards horizontally between the posts. Use nails or screws to secure them firmly. The number of rails will depend on the desired height and spacing. Ensure that the rails are evenly spaced and level.

7. Adding Gates

If you plan to have an entry point to the corral, install gates at the appropriate locations. Make sure the gates are wide enough for easy access of animals and equipment. Use hinges and latches to secure the gates in place.

8. Finishing Touches

Inspect the entire corral fence for any loose or protruding nails or screws. Trim any excess material and make sure the fence is safe and secure. Consider painting or staining the fence to protect it from weathering and increase its lifespan.

9. Maintenance

Regularly inspect the corral fence for any damage or wear. Replace any broken or damaged parts promptly. Keep the fence clean and clear of debris to maintain its functionality and appearance.

10. Safety Considerations

When building a corral fence, always prioritize safety. Wear appropriate protective gear such as gloves and goggles. Use caution when handling tools and working with heavy materials. Ensure the fence is sturdy and free from any hazards that could injure the animals or humans.


Building a corral fence may require some time and effort, but it is a worthwhile investment for the safety and well-being of your animals. Follow these steps and take the necessary precautions, and you'll have a sturdy and reliable corral fence that will serve its purpose for years to come.

Building a Wrought Iron Ornamental Fence

Introduction

A wrought iron ornamental fence adds both beauty and security to any property. Its intricate designs and durable construction make it a popular choice for homeowners and businesses alike. This HTML document will guide you through the process of building your own wrought iron fence.


Step 1: Planning

Before you begin, it's important to plan your fence. Determine the desired height, length, and style of the fence. Take accurate measurements of the area where the fence will be installed. Consider any local regulations or permits that may be required.

Step 2: Gathering Materials

To build a wrought iron fence, you will need the following materials:

  • Wrought iron fence panels
  • Iron posts
  • Concrete
  • Fasteners
  • Paint or finish
  • Tools: drill, wrench, level, measuring tape, etc.

Step 3: Installing the Posts

Start by marking the locations for the posts according to your measurements. Dig holes for the posts, ensuring they are deep enough to provide stability. Place the posts in the holes and fill them with concrete. Use a level to ensure the posts are plumb and let the concrete cure.

Step 4: Attaching the Fence Panels

Once the concrete has cured, attach the fence panels to the posts using appropriate fasteners. Make sure the panels are aligned and level. Use a wrench to tighten the fasteners securely.

Step 5: Finishing Touches

After the fence panels are installed, apply a coat of paint or finish to protect the wrought iron from rust and enhance its appearance. Choose a color that complements your property's aesthetics. Allow the paint or finish to dry completely before proceeding.

Step 6: Maintenance

To ensure the longevity of your wrought iron fence, perform regular maintenance. Inspect the fence for any signs of rust or damage and address them promptly. Clean the fence with a mild detergent and a soft brush to remove dirt and debris. Apply a new coat of paint or finish as needed.

Conclusion

Building a wrought iron ornamental fence requires careful planning and attention to detail. By following the steps outlined in this document, you can create a beautiful and durable fence that enhances the security and aesthetics of your property. Enjoy the process and admire your handiwork for years to come!

Building a Cedar Split-Rail Fence

A cedar split-rail fence is a classic and rustic option that can add charm to any property. Whether you want to enhance your garden, secure your livestock, or simply define your property boundaries, a cedar split-rail fence is a durable and visually appealing choice. In this guide, we will walk you through the process of building your own cedar split-rail fence.


Materials Needed

Cedar rails

Cedar posts

Gravel

Concrete mix

Level

Shovel

Post hole digger

Hammer

Nails

Saw

Tape measure

Step 1: Planning

Start by planning the layout of your fence. Measure the perimeter where you want to install the fence and mark the locations for the posts. Typically, cedar split-rail fences have posts spaced about 8 feet apart. Make sure to check your local building codes and regulations before proceeding.

Step 2: Digging Holes

Use a post hole digger to dig holes for the fence posts. The holes should be approximately one-third the height of the posts and deep enough to provide stability. Remove any rocks or debris from the holes.

Step 3: Installing Posts

Place a cedar post into each hole and ensure they are level. Use a level to make adjustments as needed. Once the posts are level, pour gravel into the holes around the posts to provide additional stability.

Step 4: Attaching Rails

Measure the distance between each post and cut the cedar rails to fit. Place the rails horizontally between the posts, positioning them at desired heights. Use a saw to trim the rails as necessary.

Step 5: Securing Rails

Attach the rails to the posts using nails. Make sure the rails are securely fastened to provide stability and durability. Use a hammer to drive the nails into the posts and rails.

Step 6: Finishing Touches

Once all the rails are attached, take a step back and inspect the fence. Make any necessary adjustments to ensure it is level and aesthetically pleasing. If desired, you can stain or seal the cedar to protect it from the elements and enhance its natural beauty.

Maintenance Tips

To keep your cedar split-rail fence in top condition, it's important to perform regular maintenance:


Inspect the fence periodically for any loose rails or posts and repair them promptly.

Clean the fence with a mild detergent and water to remove dirt and debris.

Apply a fresh coat of stain or sealer every few years to protect the wood.

Trim any vegetation growing near the fence to prevent it from damaging the wood.


Conclusion

Building a cedar split-rail fence can be a rewarding DIY project that adds both functionality and aesthetic appeal to your property. With careful planning and proper installation, you can create a durable and timeless fence that will last for years to come. Remember to follow safety guidelines and local regulations throughout the process. Enjoy the process of building your fence and admire the natural beauty of the cedar as it complements your surroundings.

Common Types of Farm Fence and Livestock Ranch Fence

A well-constructed and properly maintained fence is an essential component of any farm or livestock ranch. It serves multiple purposes, including keeping animals contained, preventing predators from entering, and delineating property boundaries. There are several common types of farm fences and livestock ranch fences available, each with its own unique features, benefits, and construction considerations. In this article, we will explore some of the most popular types of fences used in agricultural settings.


1. Woven Wire Fence

Woven wire fence, also known as "field fence" or "horse fence," is a popular choice for containing livestock such as horses, cattle, and sheep. It consists of vertical and horizontal wires woven together to form a mesh pattern. The key features and benefits of woven wire fence include:

  • Durability: Woven wire fence is made from high-tensile steel or galvanized wire, providing excellent strength and longevity.
  • Security: The tight mesh pattern effectively prevents animals from pushing through or getting their heads caught.
  • Versatility: Woven wire fence can be installed on various types of terrain and can be customized to suit specific livestock needs.
  • Aesthetics: It offers a traditional farm look and can blend well with the surrounding landscape.

To construct a woven wire fence, follow these tips:

  • Clear the fence line from any obstructions such as rocks or vegetation.
  • Mark the location of the fence posts, ensuring proper spacing (typically 8 to 12 feet apart).
  • Dig post holes to the appropriate depth and set the posts securely in the ground using concrete or tamped soil.
  • Unroll the woven wire mesh along the fence line, attaching it securely to the posts with fencing staples.
  • Stretch the wire tightly using a fence stretcher to prevent sagging.
  • Secure the bottom of the fence to the ground with stakes or bury it slightly to prevent animals from digging under.

2. Barbed Wire Fence

Barbed wire fence is a classic choice for livestock ranches, particularly for containing cattle and horses. It consists of two or more strands of wire twisted together, with sharp barbs spaced at regular intervals. Here are the main features and benefits of barbed wire fence:

  • Cost-effective: Barbed wire is relatively inexpensive compared to other fencing options.
  • Deterrence: The barbs act as a deterrent, preventing livestock from leaning or pushing against the fence.
  • Longevity: When properly installed and maintained, barbed wire fence can last for many years.
  • Boundary marking: It provides a clear visual boundary, discouraging trespassers or unauthorized access.

When constructing a barbed wire fence, consider the following tips:

  • Begin by clearing the fence line and removing any obstacles.
  • Space the fence posts adequately (10 to 12 feet apart) and ensure they are firmly set in the ground.
  • Attach wire clips or fence staples to the posts, securing the strands of barbed wire at the desired height.
  • Use a tensioning tool or come-along to stretch the wire tightly, removing any slack.
  • Place warning signs or markers to alert people about the presence of barbed wire.

3. Electric Fence

Electric fence systems are widely used in farming and ranching to contain various types of livestock. These fences use a combination of conductive wires, posts, and energizers to deliver a harmless but memorable electric shock when touched. The key features and benefits of electric fences include:

  • Effective containment: Electric fences provide a psychological barrier, training livestock to respect the fence and stay within the designated area.
  • Easy installation: Electric fences are relatively simple to install and can be adapted to suit different terrains and livestock types.
  • Low maintenance: Once properly installed, electric fences require minimal maintenance.
  • Portability: Temporary electric fences can be easily set up and moved to different areas as needed.
  • Flexibility: Electric fences can be customized with multiple wires and insulators to accommodate specific livestock species.


When constructing an electric fence, follow these tips:

  • Plan the layout of the fence, determining the desired area of containment.
  • Install sturdy corner and end posts, ensuring they are properly grounded.
  • Attach the electric wire or tape to the posts using suitable insulators.
  • Connect the electric fence energizer to the fence, following the manufacturer's instructions.
  • Test the fence regularly to ensure it is functioning correctly and delivering an adequate shock.
  • Post warning signs to alert people about the presence of an electric fence.

4. Split Rail Fence

Split rail fence, also known as "post and rail" fence, is a popular choice for farms and ranches seeking a rustic and decorative boundary. It typically consists of wooden posts and horizontal rails without any wire mesh. The main features and benefits of split rail fence include:

  • Aesthetics: Split rail fence enhances the visual appeal of the property and can complement natural surroundings.
  • Easy installation: It requires minimal hardware and can be installed without the need for specialized tools.
  • Visibility: Split rail fence allows for good visibility both into and out of the enclosed area.
  • Boundary marking: It serves as a clear boundary marker, helping to define property lines.

When constructing a split rail fence, consider the following tips:

  • Determine the layout and spacing of the fence posts, accounting for the length of the rails.
  • Measure and dig post holes to the appropriate depth, ensuring they are evenly spaced along the fence line.
  • Place the wooden posts in the holes, using gravel or concrete for added stability if desired.
  • Insert the horizontal rails into the post slots, making sure they are securely seated.
  • Level the rails and adjust as necessary to maintain a consistent height and alignment.
  • Consider applying a protective coating or stain to the wood for increased durability and longevity.

Conclusion

Choosing the right type of farm fence or livestock ranch fence is crucial for ensuring the safety, containment, and proper management of animals. Woven wire fence, barbed wire fence, electric fence, and split rail fence are among the common options available, each with its own set of features, benefits, and construction considerations.


Before embarking on any fence construction project, it is important to assess the specific needs of your livestock, the terrain, and your budget. Additionally, always consult local regulations and seek professional advice when necessary.


By selecting and constructing the appropriate fence, you can enhance the functionality, security, and aesthetics of your farm or livestock ranch, providing a safe environment for both animals and property.

Share by: